How to blur a photo on iPhone and protect your privacy online


From a utility bill left on the kitchen counter to a parking permit visible behind a selfie, everyday photos can reveal personal information. In many cases, the privacy risk isn't the subject of the photo. It's a small detail in the background that goes unnoticed until the image is already online.
An iPhone offers several ways to hide sensitive details before a photo leaves your device. This guide explains how to blur backgrounds, conceal specific information, use pixelation when appropriate, and take a few additional privacy steps before sharing photos online.
What to blur before sharing iPhone photos online
Online photos rarely stay confined to their original audience. A shared image can be saved or reposted. If it appears on a public page, it may also become easier to find through search or platform discovery.
Before sharing a photo online, check for the following:
- Identifying details: Names on badges, employee IDs, shipping labels, certificates, event passes, and other details that can identify a specific person.
- Financial information: Payment cards, receipts, invoices, order confirmations, banking documents, and QR codes that can expose sensitive data.
- Messages and on-screen content: Text conversations, email previews, notification banners, browser tabs, account dashboards, and other information displayed on nearby devices.
- Location clues: House numbers, street signs, school names, workplace branding, landmarks, parking permits, or vehicle registration plates that can reveal where a photo was taken.
- Reflections and mirrored surfaces: Windows, mirrors, sunglasses, polished tables, television screens, and other reflective surfaces that may reveal information outside the main frame.
- Other people: Family members, coworkers, customers, students, patients, or bystanders who appear in the image and may not expect their identity or location to be shared publicly.

Read more: 4 ways you can be identified through social media
How to blur a background on iPhone
iPhone includes built-in tools for creating background blur in supported photos. You can apply the effect while taking a picture in Portrait mode or adjust it later in the Photos app.
Using Portrait mode for background blur
Portrait mode creates a depth-of-field effect that separates the subject from the background. You can adjust the blur strength before taking the photo, giving you more control over how much background detail remains visible.
- Open the Camera app and swipe to Portrait mode.
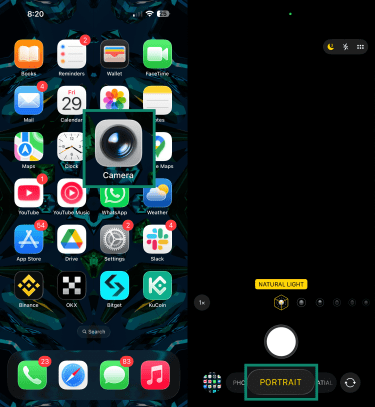
- Position the subject in the frame. If the app shows guidance about distance or lighting, adjust the shot accordingly.
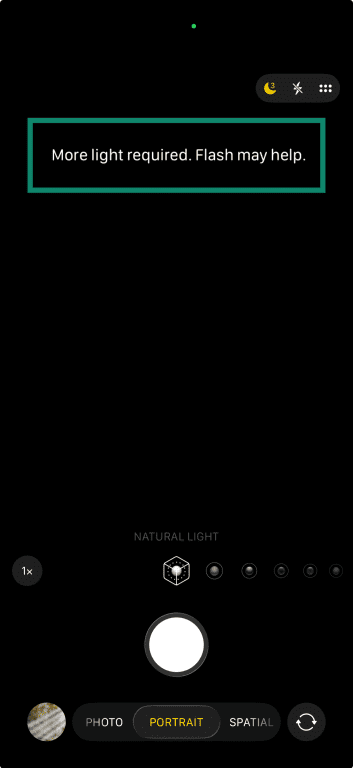
- Make sure the background is blurry, then tap the Shutter button to take the photo.
Adjusting depth control in Portrait mode
Depth Control lets you change the strength of the portrait blur after capture. The f-stop slider controls the simulated blur effect.
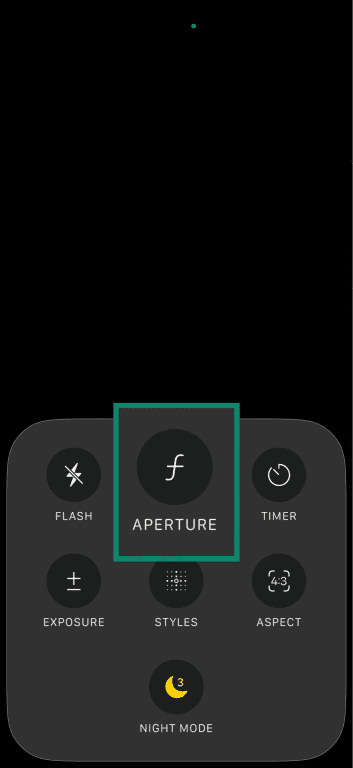
- Navigate to the Portrait mode in the iPhone camera app. Tap Camera Controls (or swipe up from the camera modes) > Aperture.
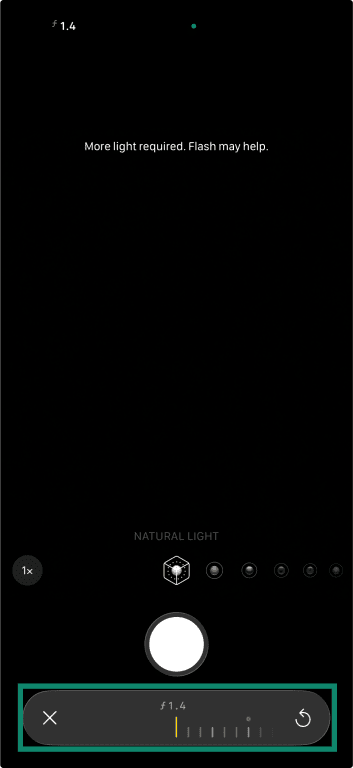
- Drag the slider to adjust the amount of background blur (low f-numbers create more blur), then take the photo.
How to adjust background blur after taking an iPhone Portrait photo
You can also manually tweak background blur in a photo taken in Portrait mode, even if you didn’t apply depth control at the time of snapping.
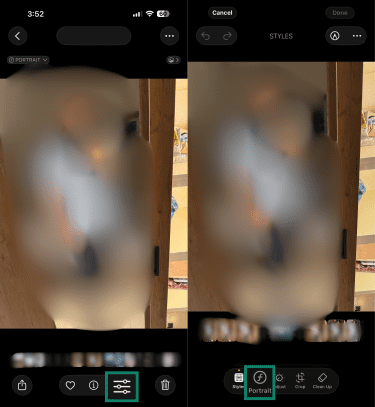
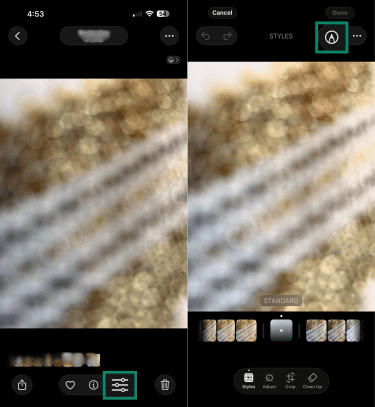
- Go to the Photos app and tap Edit (three horizontal lines icon at the bottom of the screen) on the photo you want to blur, then tap Portrait.
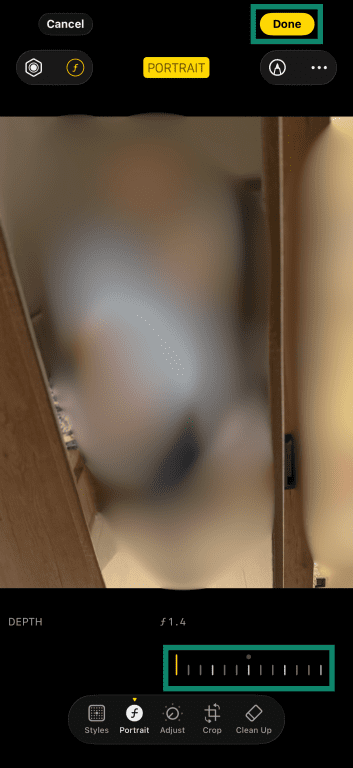
- Drag the slider to the left to add blur and tap Done.
For photos that aren’t taken in Portrait mode, the depth control slider won’t appear during Edit mode. In that case, you’ll have to use a photo editing app with a dedicated background blur tool.
How to blur part of a photo on iPhone
iPhone’s Photos app doesn’t have a built-in brush for blurring part of a photo. This is where Markup becomes a more practical option, as it lets you place an opaque mark over the area you want to hide.
Using Markup to cover sensitive details
- Open the Photos app and tap Edit on the relevant photo, then tap the pen icon to go into Markup mode.
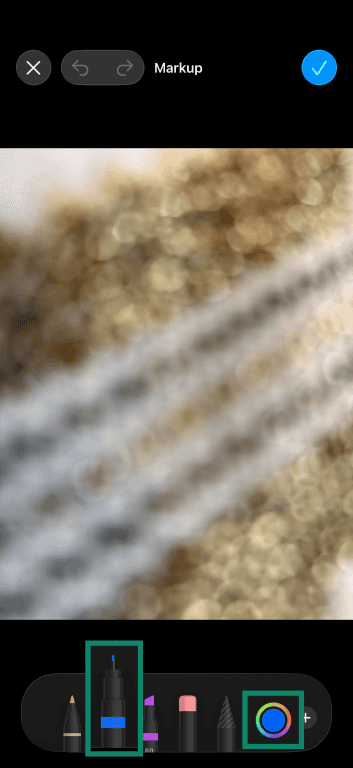
- Select the marker tool and tap the color circle to open the color options.
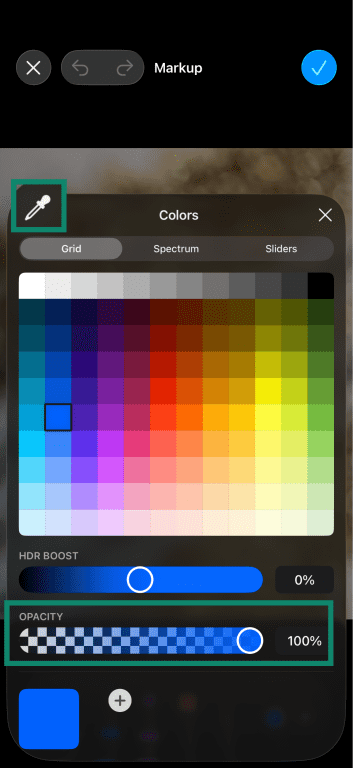
- Tap the eyedropper tool inside the color options (make sure Opacity is set to 100%).
- Drag the slider to the part of the image you want to blur, then lift your finger. The tool will automatically pick up the color of the area selected.
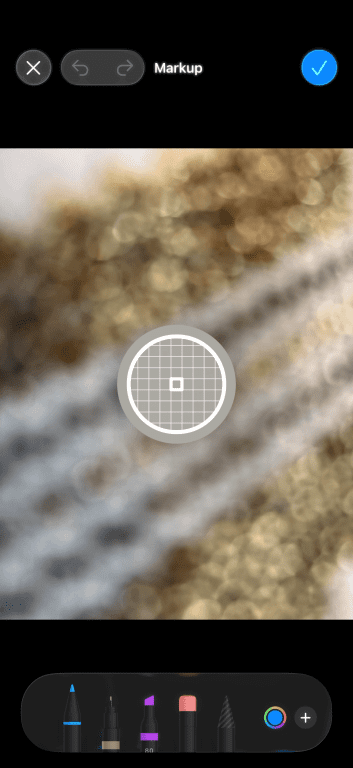
- You can now draw on the area you want to hide using a marker that blends in with photo’s color.
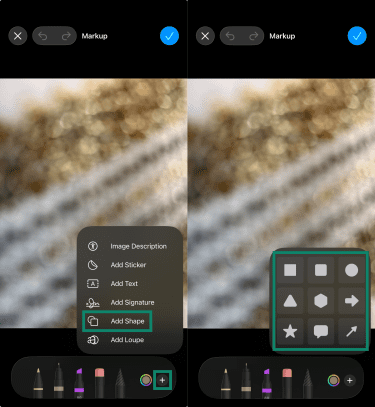
Using shapes, stickers, or emojis for stronger privacy
Freehand strokes can miss small corners, especially around text or straight edges. A filled shape, sticker, or emoji gives cleaner coverage because it sits as one solid object over the selected area. To do this:
- Open the photo, tap Edit, then the pen icon to go into Markup mode. Tap the + button, choose Add Shape, and pick a shape.
- Place the shape over the area you want to hide (you can resize it if needed). Tap the color icon for the shape, then tap the customize icon beside No Fill.
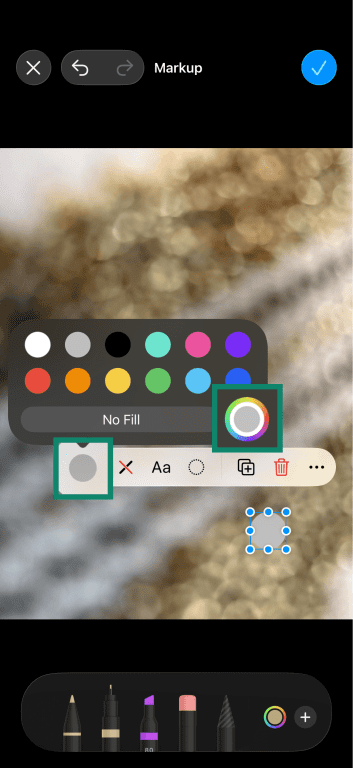
- Use the eyedropper tool to sample the color you want and apply it to the shape so it blends seamlessly into the photo.
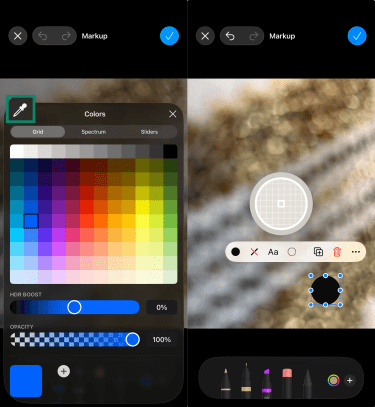
- Once done, tap the blue tick on the top right to save changes.
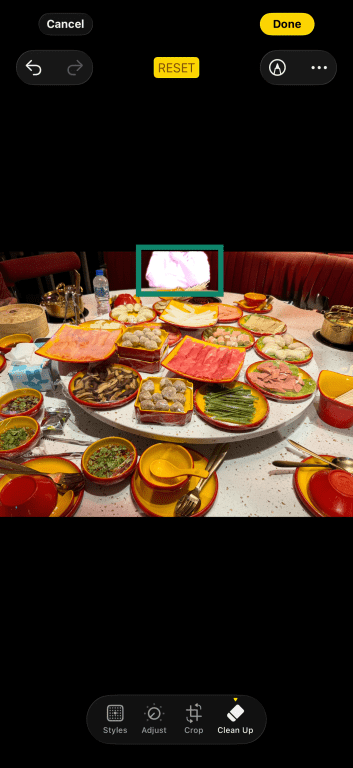
Removing identifiable information with Clean Up
On supported Apple Intelligence devices, the AI-powered Clean Up tool can remove unwanted objects, people, or distracting elements from your photos.
- Open the Photos app and select the photo you want to edit. Tap the Edit button, then Clean Up.

- The tool will show you potential unwanted objects. Tap a highlighted object to remove it, and the surrounding area will be filled in to blend naturally with the rest of the photo.
If the object you want to remove isn’t highlighted, you can brush over it with your finger. However, you need to do this carefully, as it can affect nearby details or result in unnatural-looking edits.
Pixelation vs. blurring on iPhone: Which is better for privacy?
For privacy-focused edits, the strength of the effect matters more than the technique itself. A heavy blur may hide more than light pixelation. A large-block pixel effect may hide more than a soft blur. If the edited area still looks readable or recognizable, you should increase the effect or use a solid cover-up instead.
Pixelation is also useful if you want to make it clear that your image has been edited. It replaces fine detail with blocky shapes, so viewers can tell that part of the image has been intentionally obscured.
The iOS Photos app doesn’t include built-in pixelization. If you prefer this technique, you’ll need to download a third-party editor from the App Store. Make sure to use a trusted app with a transparent privacy policy to safeguard any photos you upload.
Extra privacy steps before sharing photos
A photo can still reveal information after you've finished editing it. That’s why, before posting or sending an image, you should take a moment to review the final file.
Removing location data from iPhone photos
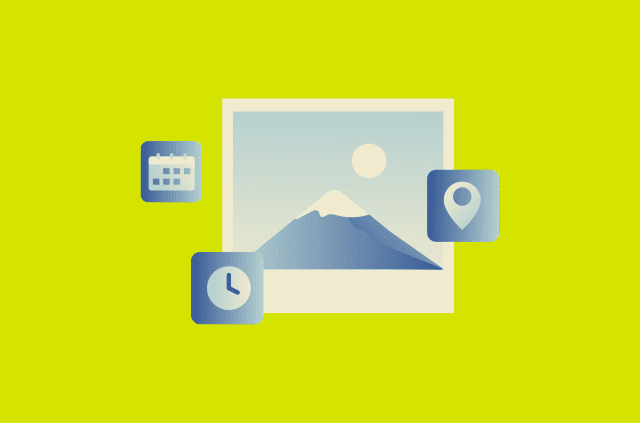
Location information can exist in a photo’s metadata, even when nothing in the image visibly shows where it was taken. This is called Exchangeable Image File Format (EXIF) data, and it can contain precise GPS coordinates.
Social media platforms typically strip EXIF data from photos when they’re uploaded, but it can be preserved in photo files that you share directly. File inspection or online EXIF data viewing tools can then be used to view the location of the photo.
Here’s how to remove this data from your iPhone pictures:
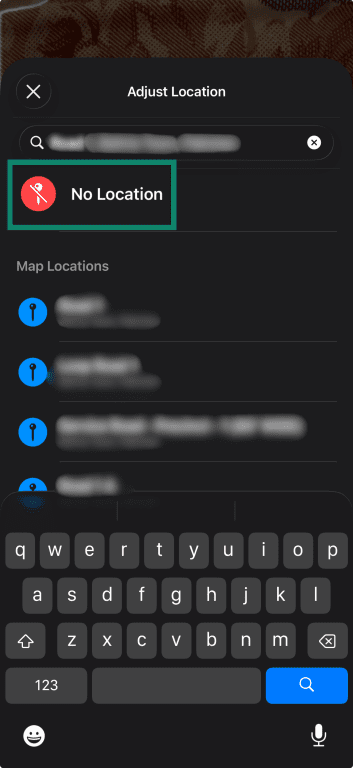
- In the Photos app, swipe up on the photo (or tap the Info button) then tap Adjust beside the location.
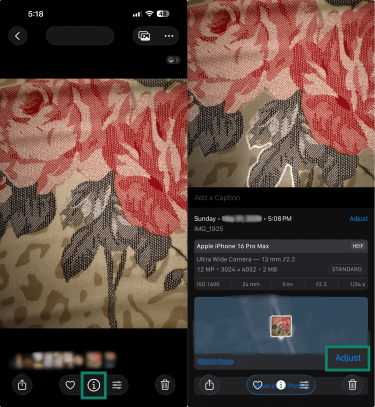
- Tap No Location to remove the saved data from that photo.
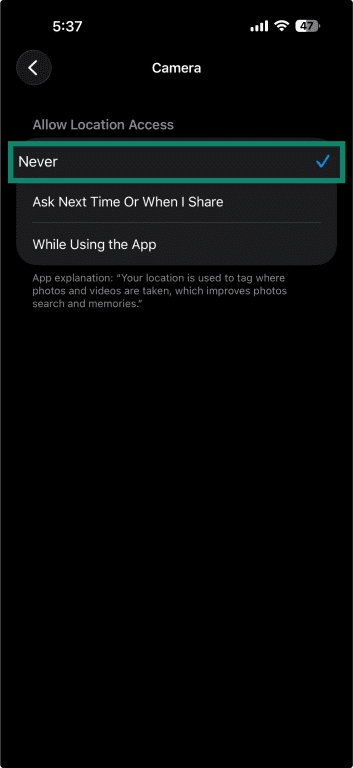
To stop the camera from adding location data to future photos:
- Go to Settings > Privacy & Security > Location Services.
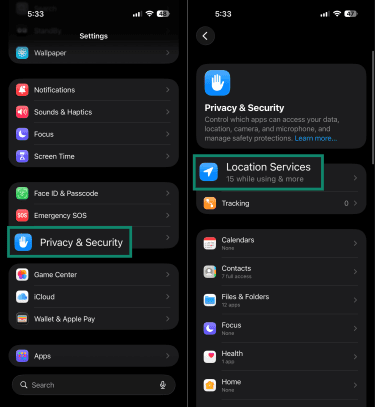
- Tap Camera and choose Never.
When sharing from the Photos app, you can also tap Options at the top of the share sheet and toggle off Location before sending the photo.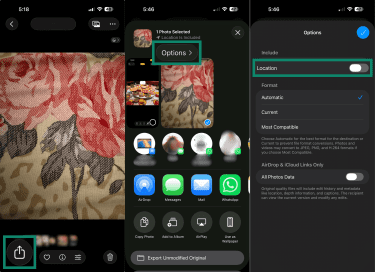
Read more: Change iPhone privacy settings for better security
Check the final edited version before posting or sharing
A privacy edit often looks different once the photo returns to the library. Marks that seemed large enough during editing can leave small gaps around the edges, while pixelation or blur may not hide as much detail as expected when viewed at full size.
It's also worth confirming that the file being shared is the edited version. Depending on the app or workflow, both the original and edited photo may still be available, making it easy to select the wrong file by mistake.
Review sharing settings
An edited photo can still reach a larger audience than intended if the destination platform is configured incorrectly. Review the audience or privacy options provided by the platform you're using. Some services allow broader access than expected, especially when sharing through links, albums, or public profiles.
Read more: Social media privacy: how to protect your data online, Top tips for internet privacy, 9 ways to stay safe on social media
FAQ: Common questions about blurring photos on iPhone
Does blurring remove hidden photo metadata?
Can someone reverse a blur on an iPhone photo?
When using cloud links or shared libraries, make sure you’re sharing the edited version and check if the recipient can access the original photo.
Should I blur faces before posting group photos?
What should I check before sharing screenshots?
Can iPhone photos reveal my location?
How do I share edited photos more safely online?
Should I blur or crop a photo to hide sensitive information?
Blurring works better when the original composition still matters. It lets you hide a specific area while keeping the rest of the photo intact. That makes it useful when removing part of the image would change what the photo shows or make the edit more distracting than the detail itself.
Blurring can also work better when more than one area needs attention. Instead of shrinking the image around every problem spot, you can treat only the sections that need to be hidden.
Take the first step to protect yourself online. Try ExpressVPN risk-free.
Get ExpressVPN